A step by step guide to configuring a custom domain for Droplr with HTTPS / SSL using AWS & CloudFront.
You will need to configure a CloudFront distribution with a SSL certificate for your custom domain that has custom.droplr.com as an origin. This guide assumes that you are familiar with AWS and CloudFront and that your domain is managed through AWS Route 53.
To begin, open the AWS Console.
Create a SSL certificate in certificate manager.
You will need to create a SSL certificate for your custom domain. You can import an existing certificate but the simplest way is to use the AWS Certificate Manager:

Request a certificate for your custom domain name:
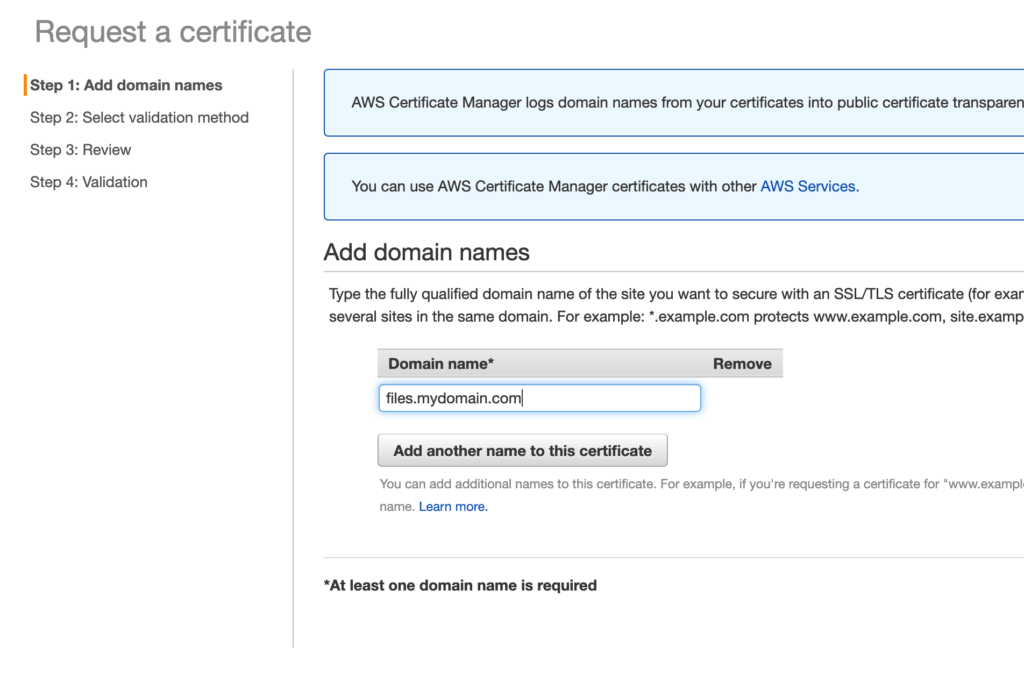
Wait until that certificate has been issued before continuing to the next step.
Create a CloudFront distribution for custom.droplr.com
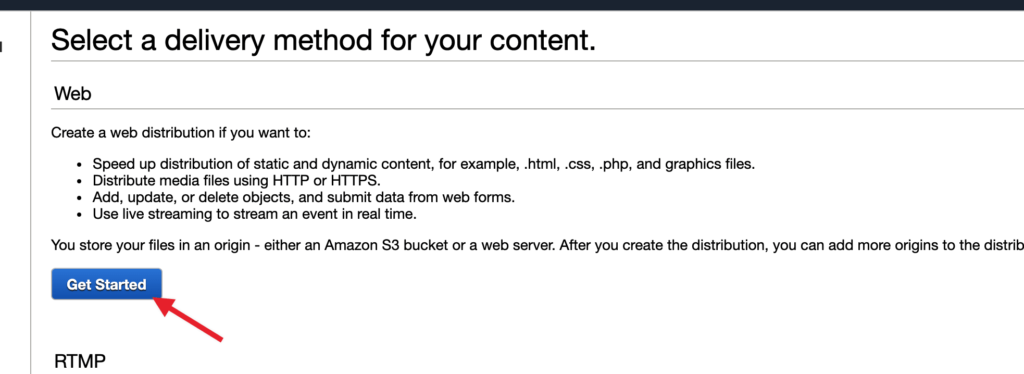
Open the CloudFront panel in the AWS Console and click “Create Distribution”. On the page that follows select “Web” for your delivery method:
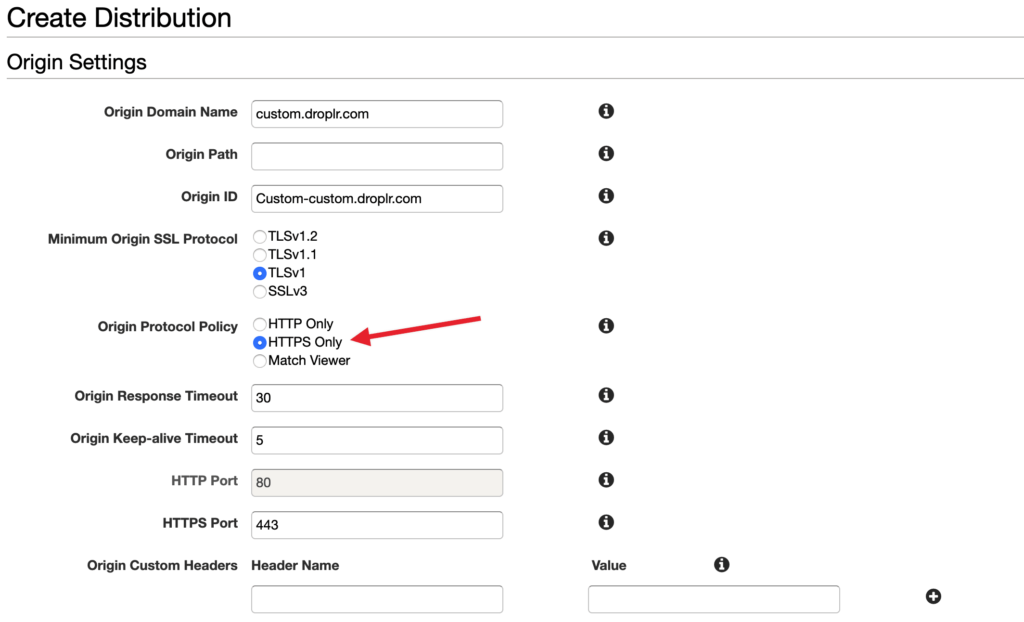
On the following screen enter the following values in the “Origin Settings” section:
- Origin Domain Name: custom.droplr.com
- Origin Protocol Policy: HTTPS Only
In the “Default Cache Behavior Settings” section:
Select “Use legacy cache settings” before configuring anything else.

Important: In “Cache Based on Selected Request Headers”, you must whitelist the “Host” header otherwise the custom domain will not work.

In the “Distribution Settings” section:
- Alternate Domain Names (CNAMEs): <Your custom domain>
- SSL Certificate: Select the SSL certificate that you created in the first step
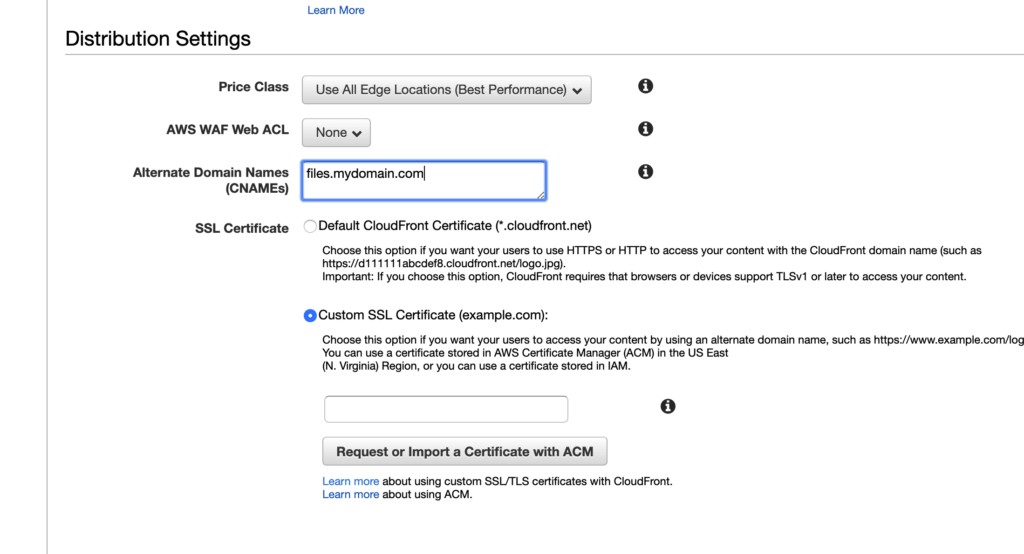
Then save your distribution and wait for it to deploy.
Update your Route 53 with a record for your custom domain
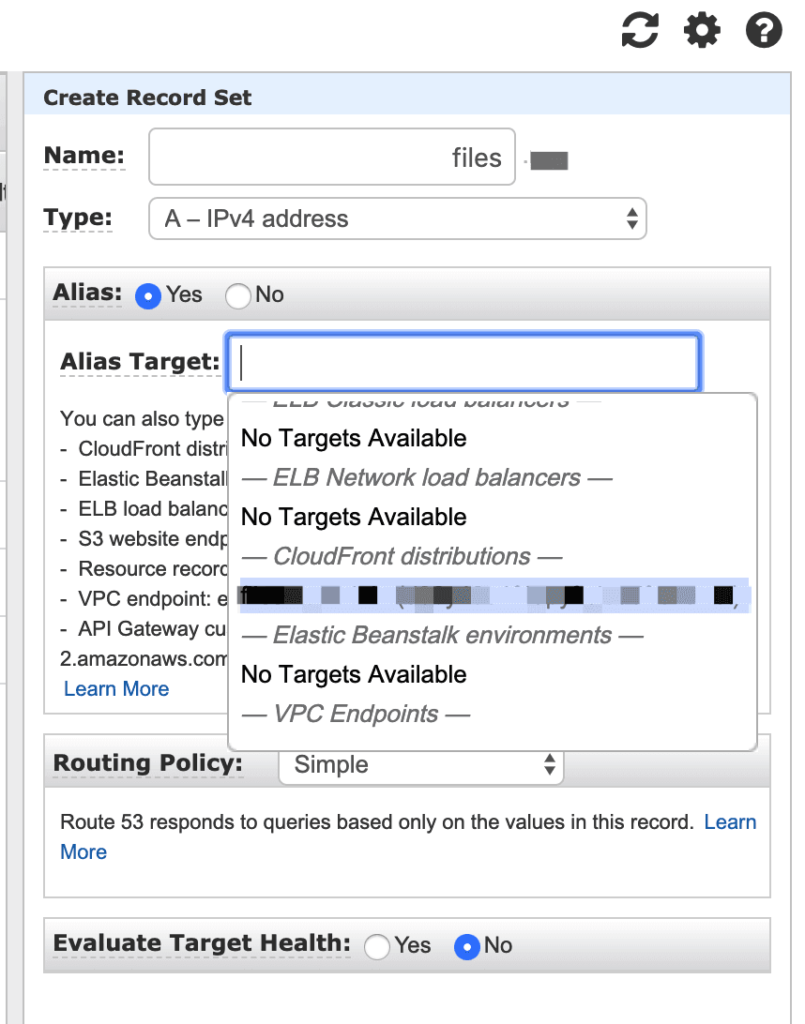
Once your distribution has deployed, create a Route 53 alias record for your custom domain.
For example: If your custom domain is: files.mydomain.com you should select the “mydomain.com” DNS zone and create record set with “files” that is an alias for your CloudFront distribution.
