Learn how screenshots help you communicate clearly and more effectively and how to take them on your computer.
Online communication is something that happens every day in the modern marketplace. It’s normal to work with people from the other side of the world. It’s crucial to learn how to effectively explain your thoughts and share precise feedback.
When you experience a language barrier, screenshots (or pictures) become the universal language. Droplr can save you a lot of time and if you are sending a lot of emails and chat messages e.g. on Slack. You’ll see a huge difference when you start using screenshots and screencasts for your day to day communication.
Screenshots are a great thing for quick collaboration. Screenshots let you save loads of time by sharing short, and more precise communication. Instead of writing what’s in your mind with endless paragraphs, you can easily share with a picture.
Whenever you want to send any information to your colleagues or clients, screenshots allow you save a lot of time during your busy work day. This prevents hours of unnecessary discussion. In a lot of instances, it saves you time from meetings when nothing gets communicated, and time is important.
Whenever you are looking to get some fast feedback on a design, or need to give the boss a status update, just make a screenshot and send it off. Super simple.
Let’s see how screenshots can help you collaborate with each other.
Screenshots help you communicate clearly with your colleagues and employees

Screenshots can be used to communicate clearly and provide information in a way that doesn’t leave room for misinterpretation. If you would like to find more ideas how you can improve team communication, check out this article.
Share Your Business Achievements
When you have good news you’d like to share with your company, just capture it on a screen and share it with all of them easily.
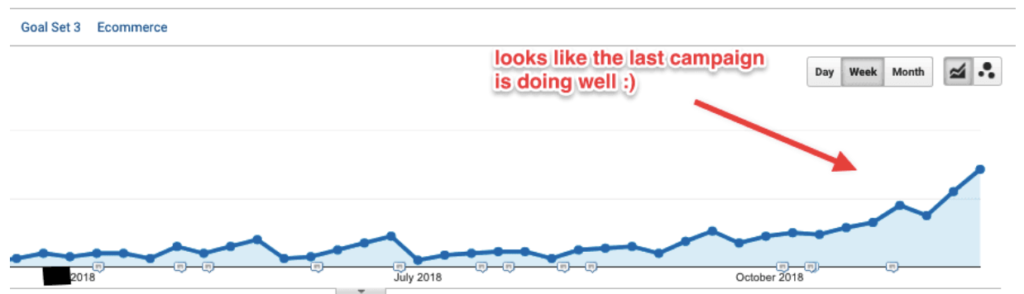
Sharing a screenshot is a highly effective way of showcasing the actual, tangible difference your product delivers in a real time. For example, if you are selling a SaaS product, showing a screenshot of your sales from the very first day using your product, and on day 30, is a fantastic way to make your product irresistible and showing the progress of it. To add more emphasis, you can annotate your screenshot as well.
Provide Feedback and Instructions to a team
Let’s say you want to give your input on a new webpage your employees created or you need to look over landing pages they are having printed, you can give your feedback easily.
Instead of writing a lengthy email with edits and revisions, you can show everything just in a single screenshot and surprise them with excellent and efficient feedback with necessary edits. This not only makes it easier for you, but it creates any confusion on the receiving end.
Need to create an onboarding training for new users? Instead of telling them, you can quickly send them a screenshot to get a reference again and again without having to repeatedly ask you.
Report a bug to show exactly what type of problem you’re having

Reporting bugs with different programs can be a tedious task. Typing out a description alone does not help to fix the problem. The most important step of reporting bugs is to show how and when it happens. The most effective way to do it is to show on the screenshot with a specific place where you have a problem. Your team of developers will love it when you report bugs this way because screenshots save them a lot of time, and sometimes without a visual report, bugs can be impossible to fix.
By capturing exactly what is happening on your screen, you communicate clearly about the problem and there is little room left for misinterpretation. You can also add some edits to your screenshots to provide a step by step guide about what’s happening and how to fix it. We wrote an article about ideas how screenshots and screencast can help in customer support.
Not only will they believe you a bug is existing, but it will be a faster process to resolve the bug, and everyone is happier!
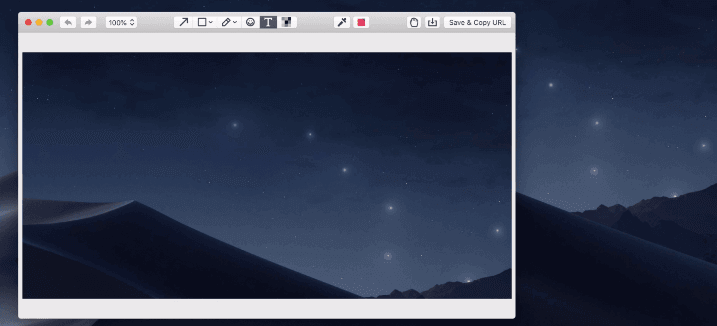
Take a Screenshot with Droplr
1. Click the Droplr icon in your menu bar. Then, click the Screenshot feature. Click and drag to select the portion of your screen you want to capture.
2. Alternatively, you can hold down Option + Shift + 4 on your keyboard. Doing this, you can select an area of your screen to take a screenshot.
3. For annotation, press Option + Shift + 3, and Droplr will grab a screenshot and open the annotation dialogue so you can add some text, draw arrows, or just scribble on the image before you transfer it to the cloud and get a Drop link in seconds.
4. For Mac, your screenshots are accessible on the app and you can find them just by clicking on the Droplr icon on the menu bar. To access annotations, click on the pencil icon. You can mark them up with shapes, text, colors and emoticons etc and click the Save button.
For Windows, your screenshot will appear to your Droplr account and a link to it will be copied to your clipboard.
5. Paste the link into a chat window, email, forum or anywhere to share.


